»

Sunday, June 24, 2012

Homemade Trellis- Part 2

Hey Everyone!

I tried to go outside this morning (actually, it's 11.. can you even classify that is morning?) to write this, but my Scarlet was being a diva and was whining to come inside!! Zoey was loving it, now that she's my easy-going dog and doesn't mind anything! 

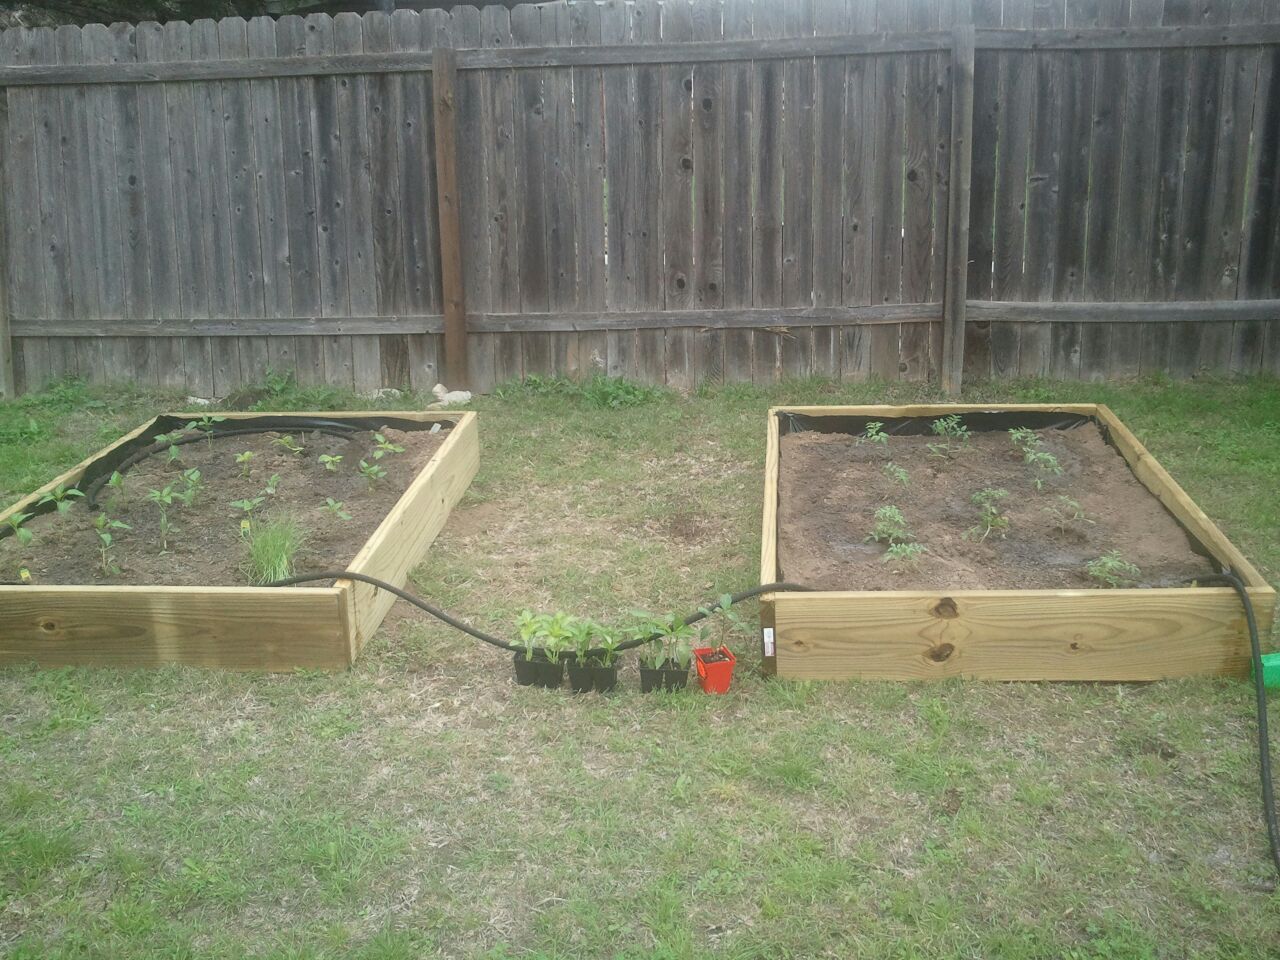
I think I will probably be spending most of my time outside this week when I'm home, as my DH and I have started a little construction project! We are replacing our floors with hardwood! :) My house is VERY dusty, although I've tried to vacuum everything. Hopefully we'll be done in a month (or sooner hon, if you're reading this!). This is what my house currently looks like, minus the living room, kitchen, and small dining room (we haven't got to this yet.. although I'm sure after I get home from work today we might continue to these rooms!)

(This is my dining room)

Anyways, on to the reason why I'm here today! I finally finished my Trellis!! :) I'm so excited about the way it turned out and the fact it was SOOO cheap!! :) 

Here are the rest of the tools you'll need to finish the project. A hammer, wire (I can't remember the gauge we used, it is fairly small. You could always double it if you needed to.), and some nails.


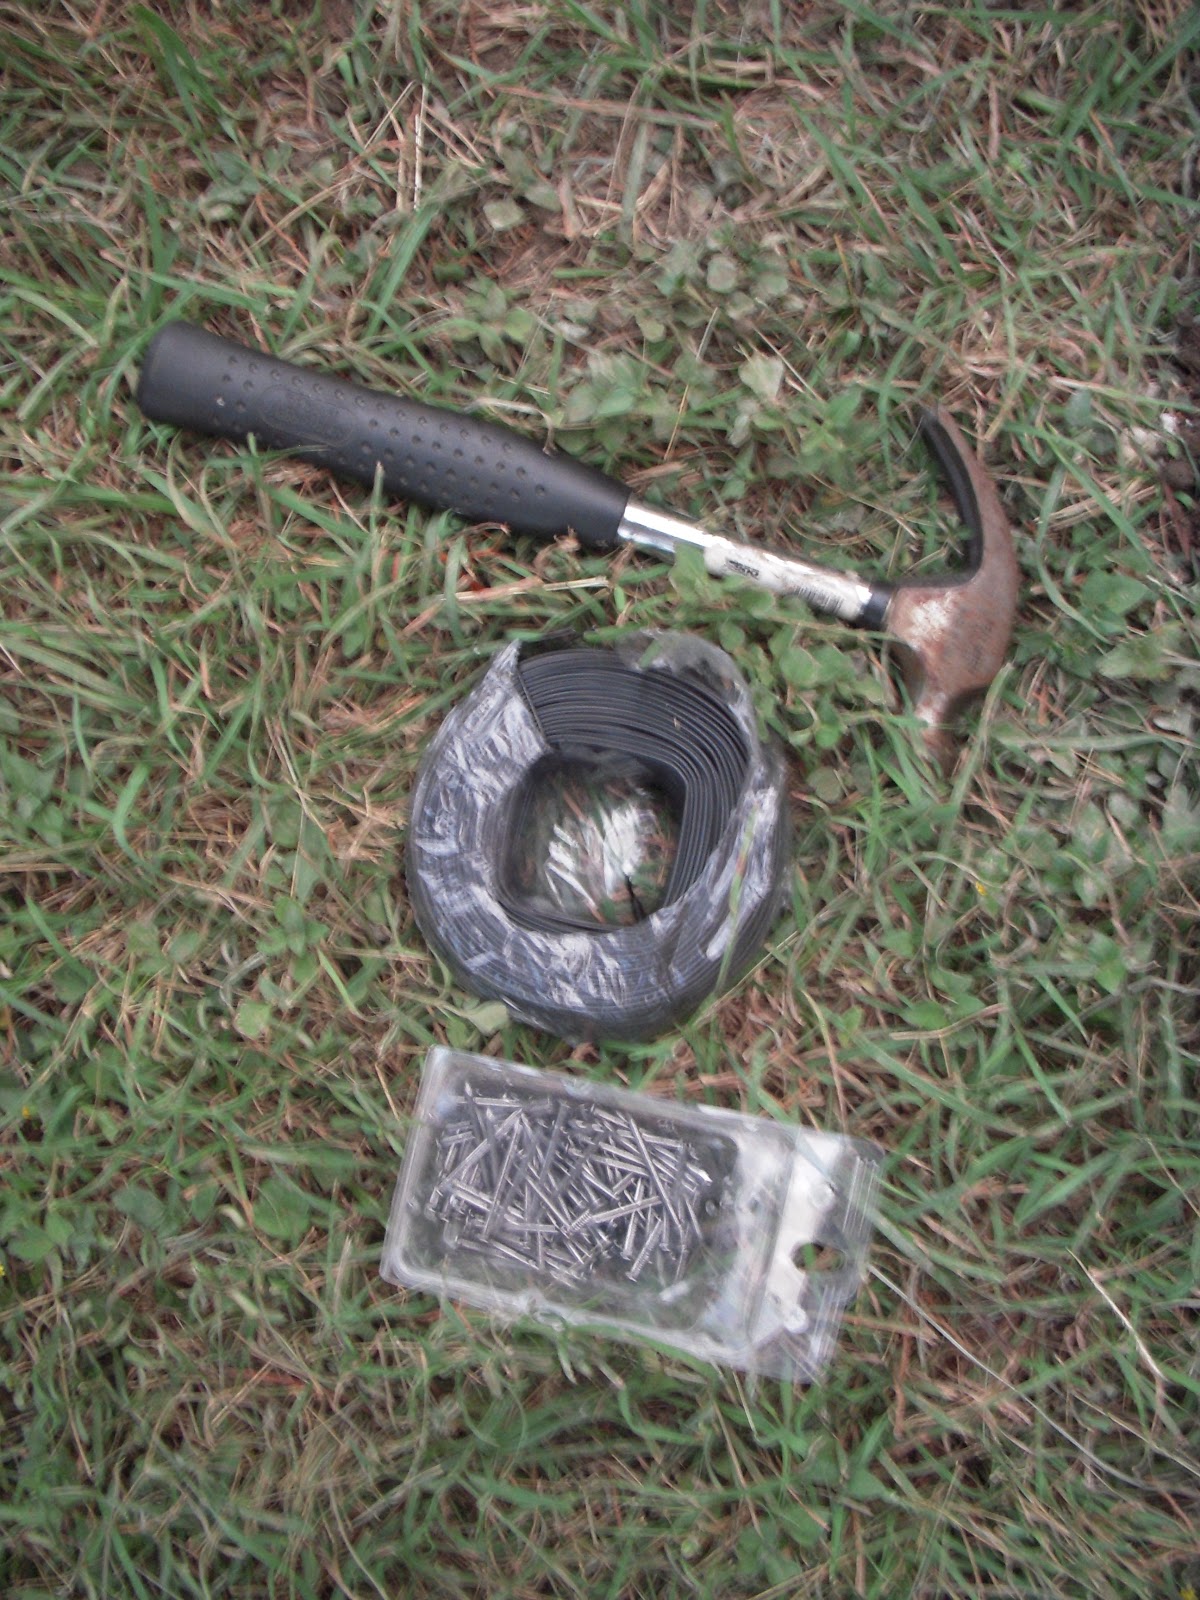
1. Start putting nails into the wood about 10-12 in. apart. I put the nails on the back, so they weren't sticking out in the front where everyone would see them. 


2. Wrap the wire around your first nail, where you're going to start it. Then hammer the nail into the wood, on the side, so the nail is holding the wire. 


Sorry the last picture is blurry, but you can see how I hit the nail up. I did not drive the nail all the way into the wood, so I would have nail left to wrap and secure the wire.

3. Then take the wire to another nail, on the other post, and wrap it around that nail. You'll keep repeating this until you're all the way to the last nail. 


Sorry that you can't really see the wire, but it's there! :)

4. Make sure that all the wire is secured by the nails and using wire cutters (sorry forgot that you'll need this tool too!) to cut the end of the wire.


5. Plant your tree/ vine or whatever you're going to use. I put some miracle grow on mine. I also use this stuff below for about a week after I plant anything new. It's really good and adds lot of nutrients to the plants. You only use a little bit of this. I think it was around $10 at Lowes.


So, the final cost break down. I looked around online and all the trellis were starting around $50.
Wire: $6
Posts x 2: $1.96
Nails: $.50 (Around this, I only used 6)
Quikrete: $3.88

Total: $12.34

That's a lot better than $50! I

If you wanted more of a lattice look, you could always get wood and make your own too! It would be a price difference, but probably still under the cost of a wood trellis!

Good luck!! :)


Sunday, June 17, 2012

Homemade Dog Treats

Hello everyone!

I wanted to share with you guys my recipe for homemade dog treats. Since I got Scarlet, my treats have been disappearing twice as fast and those suckers are expensive! These treats below are fairly easy and cheap. You might have to go to the store for the ingredients that I use because you probably don't have wheat germ just lying around in your pantry. I created this recipe based on what I had in my pantry-- Yes, I had the wheat germ because another recipe for dog treats contained this ingredient. Anyways, here's the recipe:

Peanut Butter and Pumpkin Dog Treats

1/2 c. Peanut Butter
3/4 c. Pumpkin
1/2 c. Oil
1/4 c. Honey
1/2 c. Wheat Germ
1/2 c. Old-Fashioned Oats
1 1/4 c. Whole Wheat (You will need more of this to dust the surface of the counter to roll it out.)


Here are the ingredients. Although, I forgot to add the honey to it!


1. Mix the peanut butter, pumpkin, oil, and honey together. (Here's the picture of the honey!)


2. Mix in the rest of the ingredients, the wheat germ, oats, and whole wheat flour.


3. Spread some whole wheat flour on the counter top and roll out the dough. You'll want to roll it out to about 1/4 in. I like to have a little thicker treats. 


4. Cook at 350 degrees for 20 minutes. Back down to 300 degrees for another 20 minutes. Your cooking time might be a little different than mine because I have a convection oven. Just make sure that you check the treats about every 10-15 minutes. If you see they are getting darker than you would like, but the middle of the treats are still REALLY soft, then turn the oven down.


You can see this makes a lot of treats. (Yes, I wrap my bottom oven rack with aluminum foil to keep my oven clean! It's such a great trick!!) Make sure you let them cool before you put them away, ESPECIALLY if you're putting them in a plastic bag.
I hope you guys enjoy these! 

And here's a parting shot of my two babies enjoying a stick together! They were just sprayed by the hose before this.

I hope ya'll have a wonderful week!

Sunday, June 10, 2012

Homemade Trellis- Part One

Hello Everyone!

So about two months ago (I know.. I've been procrastinating!!!), I bought a one year white grape vine from this wonderful farm market right down the road from me. I also bought a 2nd year pomegranate tree/bush! Which, I can't wait to get some pomegranates!!!

Anyways, I knew when I bought the grape vine that I wanted to make a trellis, instead of buying one! So, I got this idea in my head and I'm running with it. This is Part One of... well I don't know how many parts because I'm still building it!

Part one is about how to install wood posts for the trellis. This is also how you install wood posts for fencing. It's SUPER easy and ANYONE can do it!!

1. Dig a hole. You want the hole to be pretty deep. Dustin said that we should dig it 1/3 of the length of the fence post, but that TOTALLY did not happen because we couldn't dig any deeper.


 This is how big my hole ended up being. My foot/shovel is to show you how deep we dug it. (It was probably about 16 inches.)


2. Put the post in the hole, don't worry about making sure it is level yet.


 3. Pour the Quikrete into the hole and spread it evenly around the post. This is when you level the post in the hole. If you're doing fencing, you want this to be exact. But I didn't really mind if it wasn't exact. You'll see later why it doesn't matter. Obviously, we did eye it and it's probably pretty level.


 4. Pour a lot of water in it, like below. There is a measurement of how much water to use, on the bag. But we just poured lots of water in it. It does soak into the Quikrete, so make sure you add enough water.

5. Spread around the Quikrete to make sure it's level in the hole.


6. Leave it alone to dry.

That's it! It is so super easy that ANYONE can install wood posts! You'll see how I'm going to finish my trellis in another post. I'll tell you that, as with any other project, I watch my budget and save money. For this project, the Quikrete was $3.88 and I bought the two 8 foot posts for $.98 at HomeDepot. I usually go to Lowes, but I couldn't pass up the awesome price of them! So this project was around $6.00. I'll tell you the final total when I am finished, but it will be WAY less than buying a trellis at HomeDepot/Lowes!

I hope ya'll have a wonderful week.. and may the odds be ever in your favor! :)

Sunday, June 3, 2012

Canned Salsa Recipe

Hello Everyone! :)

As dinner cooks, (roasted chicken, rice, and peas) I figured I'd take advantage of some wonderful weather we're having in Texas and sit out in my backyard and blog. The dogs are happily chewing on a log, which was found under the fence from the previous house owners. And the DH is getting ready for his trip this week. 

This weekend was very eventful. My birthday is on Wednesday, so my parents asked me where I'd like to go for my birthday dinner. I've been dying to go to the food trucks that are off South Congress in Austin, where I've heard amazing things about them. So that's what we did! I ended up going to The Mighty Cone (Everything's served in a cone, which is quite inconvenient if you're not sitting at one of their tables with the cone holders built into the middle....) But, needless to say lunch was QUITE amazing! I got the chicken and avocado with the chili-dusted fries and a water (it was like 95 degrees this weekend!) And then we finished it off with cupcakes from Hey Cupcake! Which were DELICIOUS!!

Anyways, enough about that. 

Another thing I did was canned salsa! I've canned other things, like banana peppers and apple butter, but I've never canned salsa. I was very excited to get started. I would have canned this salsa a while ago, but I had to wait for my tomatoes to turn red in my garden. 

When my DH and I finally moved into our house, I knew I wanted to start a garden. So, my wonderful father came over and helped me build some garden boxes. Since I live in Texas the soil is very rocky and hard to plant in, so I decided to just make some garden boxes. It was really easy.. and I probably could have done it without my dad, but it was fun to spend some time with him. My boxes turned out to be 4x6 and I have two. If you have a saw and a screw driver, you can make them. I can post how at another time. Here's what the boxes looked like after I planted them in March. 


I planted a lot in the two boxes. My original plan was to make one for herbs and the other one for vegetables. But what really happened was that one became full of tomatoes and the other one peppers and a leek plant (I thought it was chives so I could plant with my tomatoes and it would keep pests away).

And here's my garden today.
(Left Box)

(Some of the Right Box)


On to the salsa!

Recipe (Adapted from Here):

Makes 4 1-Pint jars

15 tomatoes of all different types. (This is a rough guess, I did not count mine.)
2 large or 3 medium onions
10 tsp garlic
8-10 jalapenos (mine turned out to be mild, in the beginning it was hot, but after it sat it mild'd out)
2 large bell peppers
1 bunch of cilantro
1 Tbl cumin (I don't like much cumin in my recipes, so I dropped this from 1/8 cup to 1 Tbl.. okay, I REALLY don't like cumin!)
1 can tomato paste
Pickling Salt
1 Tbl lime juice for every jar, so 4 Tbl. (I used three limes and still had some left over.

1. Boil your jars for 1 minute and the lids/rings for 5 minutes.
2. The recipe on the website says to blanch and peel the tomatoes, put them in a strainer with some pickling salt and let them strain for several hours. I completely missed this step and did not peel my tomatoes, nor did I put salt in them. If you want to blanch and peel your tomatoes, go ahead.
3. Chop your tomatoes, put them in a strainer and let them strain for several hours in a cool place-- NOT YOUR FRIDGE. This will stop them from draining the liquid out! You'll still have enough liquid. But remember, I did not put salt in my tomatoes when I strained them.. you'll get more liquid out if you do that. Mine turned out great though! (It could have used some salt, but I'll just mix it in the jars when I open them!)
4. Chop your jalapenos-- PLEASE use a glove for this or your hands will be burning and if you get it into your eye, ouch! Invest in gloves!-- Chop the onions and bell peppers too.
5. Wash the cilantro and chop that. I put mine into my food processor and pulsed it until it was small. Then I put my jalapenos, green pepper, and onion in and pulsed a few times to get it incorporated.
6. Take the tomato paste and mix it with the tomatoes. 
7. Mix everything, BUT THE LIME JUICE, together. The recipe said to boil the salsa, I did not. After the salsa is mixed, put into the canning jars, put 1 Tbl lime juice on the top of the salsa in each jar. Wipe the glass at the top off and put the lid/ring on-- DO NOT over tighten the ring, it will cause the jars not to vacuum seal themselves.
8. Put them in boiling water for 20 minutes. This is the processing time. If your jars do not seal, when they come out of the water, try pushing the seal down. Sometimes it just needs a little help.
9. Keep them upright for at least 24 hours, then put them in the back of your pantry until you need some salsa!

I would highly recommend buying this canning kit from Wal-mart. (Although I hate Wal-mart.. sometimes they do have the best priced items.) It has a funnel, a measuring tool, a magnetic tool, and a tool to help you lift the jars out of the boiling water.


Here's my jars!!


And last, I wanted to show you what my DH got me for my birthday! He spent all day putting it together! I can't wait to use it!


Have a wonderful week! :) 

And, May the odds be ever in your favor!