»

Sunday, June 3, 2012

Canned Salsa Recipe

Hello Everyone! :)

As dinner cooks, (roasted chicken, rice, and peas) I figured I'd take advantage of some wonderful weather we're having in Texas and sit out in my backyard and blog. The dogs are happily chewing on a log, which was found under the fence from the previous house owners. And the DH is getting ready for his trip this week. 

This weekend was very eventful. My birthday is on Wednesday, so my parents asked me where I'd like to go for my birthday dinner. I've been dying to go to the food trucks that are off South Congress in Austin, where I've heard amazing things about them. So that's what we did! I ended up going to The Mighty Cone (Everything's served in a cone, which is quite inconvenient if you're not sitting at one of their tables with the cone holders built into the middle....) But, needless to say lunch was QUITE amazing! I got the chicken and avocado with the chili-dusted fries and a water (it was like 95 degrees this weekend!) And then we finished it off with cupcakes from Hey Cupcake! Which were DELICIOUS!!

Anyways, enough about that. 

Another thing I did was canned salsa! I've canned other things, like banana peppers and apple butter, but I've never canned salsa. I was very excited to get started. I would have canned this salsa a while ago, but I had to wait for my tomatoes to turn red in my garden. 

When my DH and I finally moved into our house, I knew I wanted to start a garden. So, my wonderful father came over and helped me build some garden boxes. Since I live in Texas the soil is very rocky and hard to plant in, so I decided to just make some garden boxes. It was really easy.. and I probably could have done it without my dad, but it was fun to spend some time with him. My boxes turned out to be 4x6 and I have two. If you have a saw and a screw driver, you can make them. I can post how at another time. Here's what the boxes looked like after I planted them in March. 
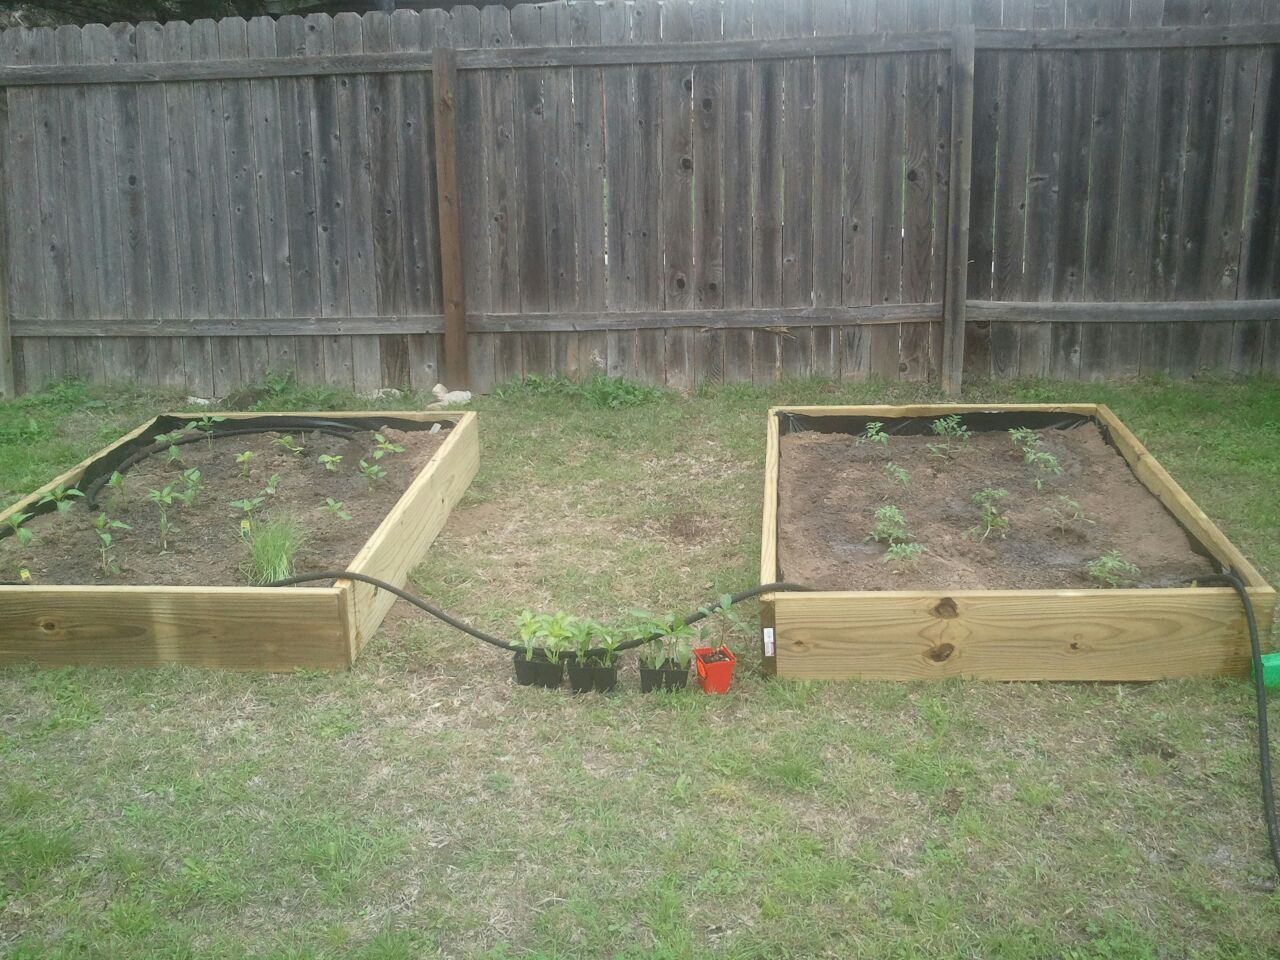

I planted a lot in the two boxes. My original plan was to make one for herbs and the other one for vegetables. But what really happened was that one became full of tomatoes and the other one peppers and a leek plant (I thought it was chives so I could plant with my tomatoes and it would keep pests away).

And here's my garden today.
(Left Box)

(Some of the Right Box)


On to the salsa!

Recipe (Adapted from Here):

Makes 4 1-Pint jars

15 tomatoes of all different types. (This is a rough guess, I did not count mine.)
2 large or 3 medium onions
10 tsp garlic
8-10 jalapenos (mine turned out to be mild, in the beginning it was hot, but after it sat it mild'd out)
2 large bell peppers
1 bunch of cilantro
1 Tbl cumin (I don't like much cumin in my recipes, so I dropped this from 1/8 cup to 1 Tbl.. okay, I REALLY don't like cumin!)
1 can tomato paste
Pickling Salt
1 Tbl lime juice for every jar, so 4 Tbl. (I used three limes and still had some left over.

1. Boil your jars for 1 minute and the lids/rings for 5 minutes.
2. The recipe on the website says to blanch and peel the tomatoes, put them in a strainer with some pickling salt and let them strain for several hours. I completely missed this step and did not peel my tomatoes, nor did I put salt in them. If you want to blanch and peel your tomatoes, go ahead.
3. Chop your tomatoes, put them in a strainer and let them strain for several hours in a cool place-- NOT YOUR FRIDGE. This will stop them from draining the liquid out! You'll still have enough liquid. But remember, I did not put salt in my tomatoes when I strained them.. you'll get more liquid out if you do that. Mine turned out great though! (It could have used some salt, but I'll just mix it in the jars when I open them!)
4. Chop your jalapenos-- PLEASE use a glove for this or your hands will be burning and if you get it into your eye, ouch! Invest in gloves!-- Chop the onions and bell peppers too.
5. Wash the cilantro and chop that. I put mine into my food processor and pulsed it until it was small. Then I put my jalapenos, green pepper, and onion in and pulsed a few times to get it incorporated.
6. Take the tomato paste and mix it with the tomatoes. 
7. Mix everything, BUT THE LIME JUICE, together. The recipe said to boil the salsa, I did not. After the salsa is mixed, put into the canning jars, put 1 Tbl lime juice on the top of the salsa in each jar. Wipe the glass at the top off and put the lid/ring on-- DO NOT over tighten the ring, it will cause the jars not to vacuum seal themselves.
8. Put them in boiling water for 20 minutes. This is the processing time. If your jars do not seal, when they come out of the water, try pushing the seal down. Sometimes it just needs a little help.
9. Keep them upright for at least 24 hours, then put them in the back of your pantry until you need some salsa!

I would highly recommend buying this canning kit from Wal-mart. (Although I hate Wal-mart.. sometimes they do have the best priced items.) It has a funnel, a measuring tool, a magnetic tool, and a tool to help you lift the jars out of the boiling water.


Here's my jars!!


And last, I wanted to show you what my DH got me for my birthday! He spent all day putting it together! I can't wait to use it!


Have a wonderful week! :) 

And, May the odds be ever in your favor!

Monday, May 28, 2012

Homemade Dish Washer Detergent

Hello Everyone!

Sorry for my sabbatical, life has been so crazy! My DH got a new job, we bought a house, and got a new puppy! Needless to say those three things have been filling my life to the max, along with a full time job and the fact that my husband now travels Monday through Thursday.

I had to quit being a Close to My Heart consultant because things got so crazy! Although, I LOVE to scrapbook, CTMH is just not feasible right now. I do meet once to twice a month with some Stampin' Up ladies, which I absolutely love right now! It's nice to have some girl time once in a while!

Because I am no longer a CTMH consultant, I want to change my blog (just a tad!). Although the name will not change, the contents will! Since my DH and I just bought a house, I've been into DIY things lately! I will be sharing things that I am DIYing in my life on my blog! I will also put some scrapbook things in here as well, but I'm just so excited about my garage sale items, my homemade things, my storage ideas, etc. that I want to share them with you! I am also really into Pinterest.com which is where I'm getting most of my ideas from!

With that said, let me begin with my first new blog post!

Homemade Dish Washer Detergent


The house that my DH and I bought has a septic system and cannot handle a lot of the cleaners we used to use in our apartment. (My septic system is a Hoot system. http://www.hootsystems.com/ is their site and they have a great page about what you should and should not put down your septic system.)

I used to use the Finish Powerball Dishwasher Tablets, which I absolutely loved. And they weren't TOO expensive. (60 count is $12 on Amazon) Since I could not find on the package where it said they were septic safe and because I had seen multiple recipes on Pinterest.com, I decided to make my own. I looked a many recipes and came up with the simplest and cheapest one! :)  (Because I like simple!)  All the ingredients are natural and safe for septic systems. Here are the ingredients:


Recipe:
Equal Parts Washing Soda and Borax
1/2 as much Lemi-Shine
Fill up your "Rinsing Agent" space with Vinegar (Your dishwasher will NOT smell like vinegar when you use this.)

Add 1-2 Tablespoons each wash. I normally do about 2 Tablespoons. 

For example:
1 cup Washing Soda
1 cup Borax
1/2 cup Lemi-Shine
(This is all I made the first time. I made it about a month ago and do 3 to 4 loads a week and I still have about a cup and a half left.)

I only made a little of this at a time because it does clump up. I'm not sure why. (It might be the Lema-Shine. Next time I make this, I am not going to put the Lemi-Shine it in until I put it in my dishwasher.) 

Also, make sure to put vinegar into your rinsing agent spot. Most recipes I found used lemon flavored Kool-Aid as well to help with rinsing, but I decided to use vinegar because I didn't want the Kool-Aid to stain anything. And I read that it could also stain your dishwasher (I would imagine that this would only be if you had a white dishwasher). I have a Kenmoore Elite dishwasher, which you can see below. I will also say that I do the HE wash cycle and I do not use the heated dry setting. 

I will also tell you that I rinse most of my dishes after I use them, so there is not dry food on them. I also read a lot of recipes that included Epsom salt in them, which I would imagine might help with dried on food. I did not put salt in my recipe because I wanted it to be cheaper, simpler, and I did not have a need for it.


I hope you all try this! It is way cheaper than buying the Powerball tablets that I used to buy.

Okay, so here comes the math. Bare with me!! :) The cost of breakdown is:

Borax: 76 oz- $3.40 (One cup is which is 36 cents)
Washing Soda: 55 oz- $3.30 (One cup is 48 cents)
Lemi-Shine: 12 oz- $3.66 (1/2 cup is $1.22)
Vinegar: 1 gal- $2.56 (I am not sure how much each dishwasher takes, I would imagine this is probably 25 cents each fill. But one fill of mine is probably 20 loads. So the cost of this is probably 5 cents.)
________________________
Total Cost: $12.92/ Each batch is $2.11

Since each batch is 2 and a half cups and 16 Tablespoons are in each cup, that means that there is about 40 Tablespoons in each batch. Depending on if you use 1 Tablespoon or 2 Tablespoons, the cost per load is different.

1 Tablespoon per load cost is: 5 cents
2 Tablespoons per load cost is: 11 cents

The Finish Powerball cost per load is 20 cents. So, you can see your saving between 50% and 75% depending on how many Tablespoons your using. (And this is not even counting a rinsing agent, such as JetDry!!)

I hope you all try this recipe! It works so well and it's safe for septic systems and good for the planet!

Good luck! :) (And may the odds forever be in your favor!) 


Monday, November 14, 2011

I'm Married!

Finally!!!! Here are some pictures of the amazing day!


All of these beautiful pictures were taken by Shawna Edoo.


Thursday, September 8, 2011

Santa!!

I love the new CTMH Cricut Art Philosophy Cartridge!! There is SOOOOO many things you can do with it! Here's something else I made using this cartridge! I got my inspiration from Sunflower Stamping. And I will soon be making the other cute characters on her website. So I made this completely with the Art Philosophy cartridge, no scissors!!!

(Isn't he so cute?!)

I tried to make these directions a little easier and I also shot some pictures of a cutting guide. Forgive me though because I forgot one piece.. the top of the hat!


Okay, here we go :)! Pay attention to your keys, including the shift key. I use the shift key on some of these.. including the two flowers and the bottom of the hat.

1. Cut two <Circle3> (pg41). One at 2 1/2 in. and one at 2 1/4 in. in White Daisy cardstock. These are his beards.
2. Cut two <Flower3> (pg 57). (Make sure your shift key is pushed) Both at 3/4 in. in White Daisy. These are his sideburns.
3. Cut two <Circle1> (pg 21). Both at 1/4 in. in Black cardstock. These are his eyes.
4. Cut two <Circle1> (pg 21). One at 1/2 in. (nose) and one at 2 in. (head) in Vanilla Cream cardstock.
5. Cut <Banner5> (pg 59) at 2 in. in Cranberry cardstock. This is his hat.
6. This one is tricky. Cut <Banner5> with the shift button pushed (This would make the command <Petal2>) AND the Decorative Layer button pushed. You're going to have BOTH shift and decorative layer buttons pushed before you hit the <Banner5> button. Cut this at 2 in. as well in the White Daisy cardstock.
7. (This is the one I forgot to put on the paper) Cut <Flower5> (This will be a shift one!) at 3/4 in. in White Daisy cardstock.

Now we're ready to assemble!

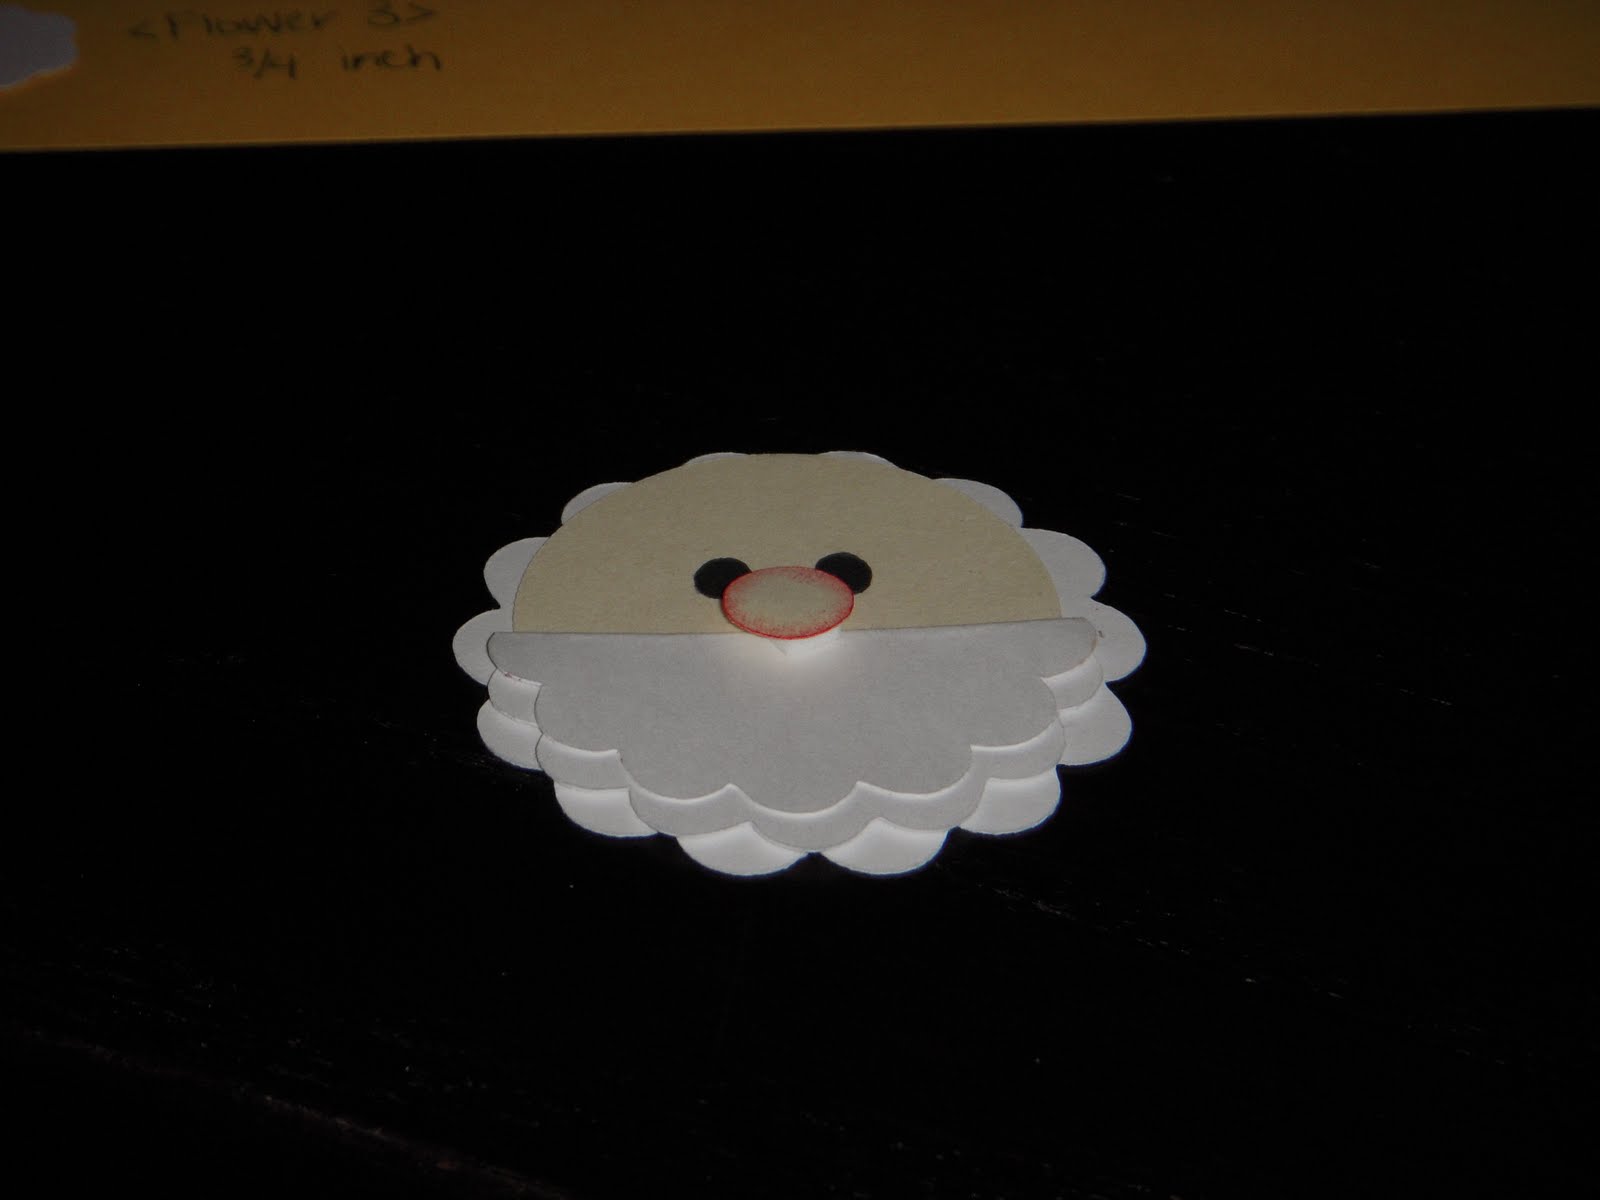
1. Take the smaller scalloped circle and fold it KIND OF in half. You're going to make a tier with this circle. Look at the picture :). Snail this together.

2. Take the Vanilla Cream circle cut at two in. and layer that onto the bigger White Daisy circle cut at 2.5 in. Make sure to put the Vanilla Cream circle towards the top of the scalloped circle, like in the picture.
Sorry this is rotated.

3. Take the "Halved" scalloped circle and place on the bottom of the head, closer to where the overlap of the bigger White Daisy scalloped circle is. This is confusing, look at the picture.

You might want to play with this a little bit to get it perfect.

4. Next add the eyes. You might want to place your nose first so you'll know where your eyes will be. Whatever works for you :).


5. Then add the nose. I first sponged it with Holiday Red Ink and I used a "Pop Dot" to make it stand out.


6. Now take a Q-Tip and put it in the Holiday Red Ink and use this to add some rosy cheeks to the Santa.

7. Next put on the <Banner3> Piece cut from Cranberry cardstock to the top of his head for his hat.
                                               
8. Put on his sideburns. Be careful with the placing of these, as you'll want to hide the folding of his beard.
9. Then put on the trim of his hat and the "Pom Pom" on the top of his hat.

10. To hide the two circle that are cut out of the trim of his hat, I used glitter gel on all the white pieces. It also makes him sparkle!!

11. And if you want to make him extra special, you can put some Holly on his hat! The Holly Berries are cut from Cranberry cardstock with the <Circle1> (pg 21) at 1/4 in. And the Holly Leaves are cut from any green paper (I had some printed paper left over from an old Christmas CTMH paper pack) with the <Leaf3> (Use shift!) (pg 46). at 3/4 in.

How cute are they!! You can see my first attempt at him on the left, not too bad for my first one!!

E-mail me if you have any questions! Dreamwithpaper@gmail.com

Wednesday, September 7, 2011

Turkey!!!

Hello everyone!

Tonight I got a little crafty! I was looking for something to make for this upcoming event that I am having and well, I came across a blog.... Craft Haven. She made treat bags with Turkeys!!! (Click on the link and it should take you to her Oct. 17th post) I thought these were really cute and I thought I'd try to cut EVERYTHING with my new cartridge from CTMH- Art Philosophy.


I did it!!! and I did not use any scissors!!! Not even ONCE! Everything on this turkey was cut using my Cricut Art Philosophy Cartridge!!!

Okay, now to the fun part. Every measurement you'll need is right here :). Now you can also cut out a topper to your treat bag using the different cuts (Like Craft Haven did on hers). I think the Square 4 or Square 8 would be cute!! BTW, this whole project is ONLY 10 cuts!!
For this post I will use the exact word underneath each cut in the Art Philosophy book that comes with the cartridge. If you have any questions, just e-mail me! Dreamwithpaper@gmail.com


1. Cut <Circle1> (pg 21) at 1 inch in Bamboo cardstock. This will be the head.
2. Cut <Circle3> (pg 41) at 2 inches in Bamboo cardstock as well. This will be the main body.
3. Sponge both of these with Chocolate ink.
4. Cut <Circle3> (pg 41) at 2.5 inches with Cranberry cardstock. Cut this in half between the scallops on both sides.
5. Cut <Banner3> (pg 39) at 3/4. This is for the gobbler.
5. Sponge both 4 and 5 with whatever red ink you have, I happen to have Holiday Red, so I just used that.
6. Cut <Circle3> (pg 41) at 3 inches in Chocolate, cut in half between the scallops on both sides.
7. Sponge Chocolate with Chocolate :)
8. Cut <Leaf2> (pg 34) at 1.5 inches with Sunset cardstock. Sponge this with whatever orange, I used Goldrush. Now cut this apart in three. You'll only use the smaller outside pieces.
9. Cut <Banner4> (pg 49) at 1/2 inch with yellow cardstock. 
10. Cut <Rctngle1> (pg 44) at 1/4 with yellow cardstock. (This is the buckle for the hat).
11. Sponge both 9 and 10 with orange ink, I used Goldrush.
12. Cut 2 <Rctngle1> (pg 44) at 3/4 with Black Ink. Make sure to cut TWO of these!
13. Use a small hole punch to cut two black eyes.

Now you're ready to assemble!!!


1. Take the two eyes and beak and place the on the 1 inch circle cut from Bamboo cardstock. Make sure to place everything a little lower because the hat will go on top of his head.
2. Place the gobbler under his head, directly underneath his beak.
3. Now you're going to assemble the body. Put the head to the side. Take the two outer sides of the leaf and put them underneath the main body (The Bamboo cardstock circle). These will be his feet.
This is the back.
This is the front. Put the feet a little close together. Sorry this picture is blurry!!!


4. Now take the red circle that is cut in half and place them behind this piece. Try to be careful and not show the sides that you cut around the feet area. At the top, you can show the pieces overlapping because the head/hat will cover it up.
Front

Back

5. Now do the same with the Chocolate cardstock that was cut at 3 inches.
Front

Back


6. Now onto the hat. Put the body to the side. Now take the two black pieces and fold one of them completely in half, hot dog style and snail it in half.

7. Assemble the hat by snailing the tall rectangle to the folded one, creating a hat. You'll put the folded piece in front with the yellow buckle on it.

8. Take the hat and snail it to the top of the turkey's head. (No picture!! Sorry!!)

9. I used "Pop Dots" to attach the turkeys head to his body.


The finished product!! Isn't he so cute!!

Remember, You can still order the CTMH Cricut Art Philosophy cartridge for $99.00 which includes three coordinating stamp sets and three coordinating chip board pieces.

Let me know if you have any questions! And look forward to other paper piecing characters using the CTMH Art Philosophy cartridge in the future!! I have to make a Santa!!

Tuesday, August 16, 2011

Free Stamp Set with Qualifying Purchase!

CTMH is offering a free DOUBLE stamp set to celebrate National Stamping Month! This is the FIRST EVER double stamp set that CTMH has created! To qualify for the exclusive My Acrylix® Pair-a-Phrase double stamp set, you'll need to place an order of $75 from August 15th to September 30,2011. This stamp set is so cute and has something for every season. View the Flyer Here.


And don't forget, with the $75 purchase, you can buy the Stamp of the Month for $5!

AND when you purchase the Stamp of the Month this month, you get another stamp set FREE! This stamp is called Typeset and is a great alphabet stamp!


Let me know if you have any questions or want to place an order!

Tuesday, July 19, 2011

New Information!!
I just found out that Provo Craft and CTMH have teamed up to create a Cricut Cartridge! Watch the YouTube video to get more information.

This bundle is only $99.00, it includes not only the cartridge, but THREE stamp sets and THREE chip board "pages."

I am so excited to buy this cartridge. The cuts include flowers, boxes, letters, shapes, etc. There are also other stamp sets you can buy that coordinate with the cuts from the cartridge. These will be in our new catalogue that will post Aug 1st. But let me tell you, there are some CUTE new paper packs and stamp sets in it!!!

I will be placing an order on Aug. 15th. Because if you place an order over $75 on 8/15 to 9/30, you'll get two stamp sets FREE! And you might be able to get the CUTE Stamp of the Month on top of that! I hope all of them stack up!

Let me know if you would like to purchase anything!!